
With trainable Field Models, Transkribus can automatically recognise and transcribe numerous layout types. This guide will first explain how to train a powerful Field Model, and then how to use the Field Model once it has been trained.
Jump to the section you want to view:
How to Use a Trained Field Model
Evaluate your Field Model (mAP)
How to Train a Field Model
1. Preparing the Training Data in Transkribus Desk
Before you can train a Field Model, you need to prepare the pages and data that the model will be trained on, called training data. This data teaches the model which areas of your pages to focus on.
To prepare your data, follow these steps:
- Upload the documents you wish to use for training into a dedicated Transkribus collection.
- Open the documents in the Transkribus Editor.
- Define Regions: Draw text regions around the specific parts of the image you want the model to recognize (e.g., headers, paragraphs, marginalia, illustrations, or specific data fields).
- Optional: Structural Tagging
If you want your model to automatically tag these regions (e.g., labeling a region as "Marginalia" and another one as "Paragraph"), you must assign Structural Tags to them, as explained in this article. Remember to Save your changes once tagging is complete.
Once you have tagged enough pages (we recommend at least 50 pages, depending on the complexity of your document's layout), it is time to start the model training.
2. Training a Model in Transkribus
The training setup is made of five steps: Select data, Data settings, Model Setup, Training parameters, and Start. You can go to the next or the previous step whenever you want by using "Next" and "Back" buttons.
Please note that training data and validation data are two different parts of the same dataset. Training Data is a set of examples used to fit the parameters of the model (the model is trained on these pages). Validation Data is a set of examples that provides an unbiased evaluation of a model (these pages are used to assess its accuracy).
Step 1: Select data
Open the collection with the data you prepared and select the specific documents you want to use as your training data.
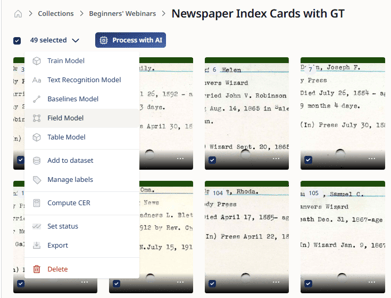
Click the pointing-down arrow, select "Train Model" and choose "Field Model".
You can choose to include in the training the last version of all pages (with text regions) or to restrict the dataset to the Ground Truth pages.
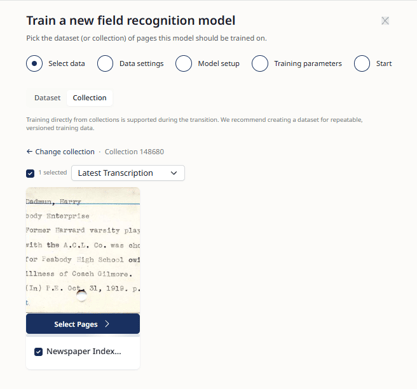
To personally select the pages to include in the training set, click on "Select Pages" (on the document preview image). This menu shows you a list of the pages with a small preview: you can select or deselect the single pages. Click on "Save and go back" to continue the training setup.
Step 2: Data settings
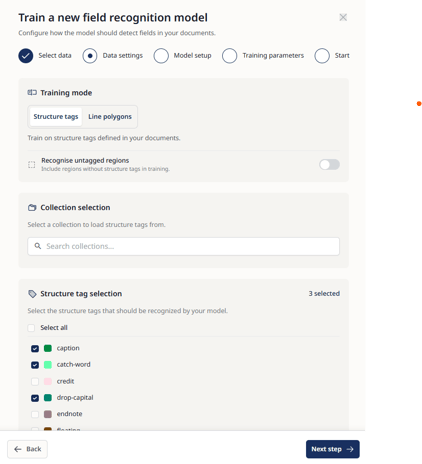
Here, you can select the Structure tags you want your field model to learn to recognize. Select the collection with your data to load the structure tags and then select the ones that you've prepared during the previous "Preparing the Training Data" phase.
If you did not use structural tags in your training data, or if you have a mix of tagged and untagged regions and want the model to recognize both, toggle on "Recognise untagged regions". If this option isn't checked, untagged regions will be ignored, and the resulting model will not recognise them.
Good to Know: Fields models can also be used to train line polygons (the underlying algorithm is the same), which are shapes encasing all the handwritten text in a line. While baselines run at the bottom of the text line, line polygons capture the entire body of the characters, including ascenders and descenders. During text recognition (or training), line polygons are automatically computed from baselines. But this process can sometimes produce inadequate results (e.g. with big-size characters, music scores, mathematical expressions), causing errors in the text recognition.
If this is the case and you need to train a line polygon model, correct the line polygons in the Ground Truth and select the box "Line polygons" to train a Field Model designed for line polygons.
Step 3: Model setup
Here, you have to add some information about your model.
- Target Collection: the collection your model will be linked to.
- Model Name: Choose a name for your new model; for example, you can use a couple of words that explain the layout your model is meant to recognise.
- Description: Provide a brief description of what kind of material you used as Ground Truth and what the model is for (e.g. octavo editions with handwritten marginalia; administrative documents with charts).
- Image URL: Optionally, you can add an image that will serve as a preview thumbnail for your model; copy and paste the image URL to do so.
Step 4: Training parameters
You can set advanced options regarding the training process. For initial trainings, it is recommended not to modify these advanced parameters and to adhere to the default advanced options, which have proven to be effective in most scenarios.
- Model Type: This defines the depth of the backbone network used in the Field Model, which is measured in layers. Choosing the Standard option (50 layers) will generate quicker results and is ideal for documents with simpler and consistent layouts. Selecting the Enhanced option (101 layers) allows your Field Model to extract more complex and detailed layout features. However, it requires more processing time and so will take longer to produce results.
- Training Cycles: These cycles indicate how many times (between 1'000 and 30'000) the model will go through the training data to learn and adjust. More cycles could result in a more accurate model, but may also risk overfitting.
- Learning Rate: It defines the increment (between 0.001 and 0.05) from one cycle to another, so how fast the training will proceed. This will affect accuracy: the higher the value (so the speed), the higher the risk that details are overlooked.
Step 5: Start
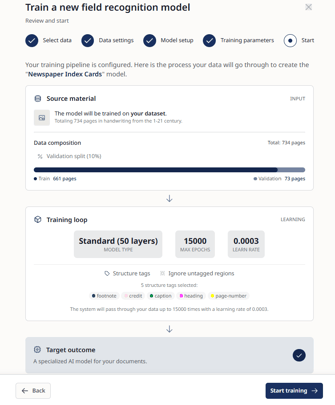
Your model is ready for training. Review all the settings and data you have inputted.
By default, your data is split into 90% Training Data and 10% Validation Data. If you want to adjust this ratio or manually choose which pages are used as Validation Data, create a dataset first and start the training from the Datasets section.
Once everything looks good, proceed by clicking "Start training" to launch the training process.
You can follow the progress of the training by clicking the "AI Jobs" in the slide-out on the left side of your Transkribus Home Screen and selecting the "Training" tab. You will receive an email when the training process is completed.
How to Use the Trained Field Model
Once your new Field Model is ready, you can try it out on your documents by following these steps:
- Select the pages or documents in your Collection you want to transcribe.
- Click on the “Process with AI” button next to the selection overview.
- A slide over will appear, with the Process Type set to “Text Recognition” by default. Change the Process Type to “Field Recognition.” In the search field, you can browse available field models. Select the newly trained Field Model.
-
You can optionally set the Advanced Setting for the recognition:
- Detection Confidence Level: this parameter (between 0.5 and 1) adjusts how sure the model has to be before labeling a field.
- Shape Detail Level: it determines the detail level of the shapes of the fields; "High" keeps the field complex; "Low" simplifies the shapes to basic forms; "Medium" balances detail and simplicity.
- Add to Existing Layout: checking this box, the model will tag the existing layout or add new fields according to model data settings.
- Merge Overlapping Regions: When enabled, this automatically combines overlapping fields that share the same tag (or are both untagged). The Merge Threshold determines how much two regions must overlap (between 0.5 and 0.95) before they are merged.
Please note that recognition will not return any results if this option is enabled while the “Shape Detail Level” is set to High. Use it only together with a Medium or Low Shape Detail Level.
- Before starting the recognition, check the displayed amount of credits needed to run the recognition job and the summary of the amount of credits available to the account (Personal credits/ Collection credits).
- After having selected the model, click the “Start recognition” button to launch the recognition process.
Please remember that your model will work better on documents that fit the training set. For example, if it has only been trained on folio books with just body text, page number and headings, it may show poor results on books with headers and footers.
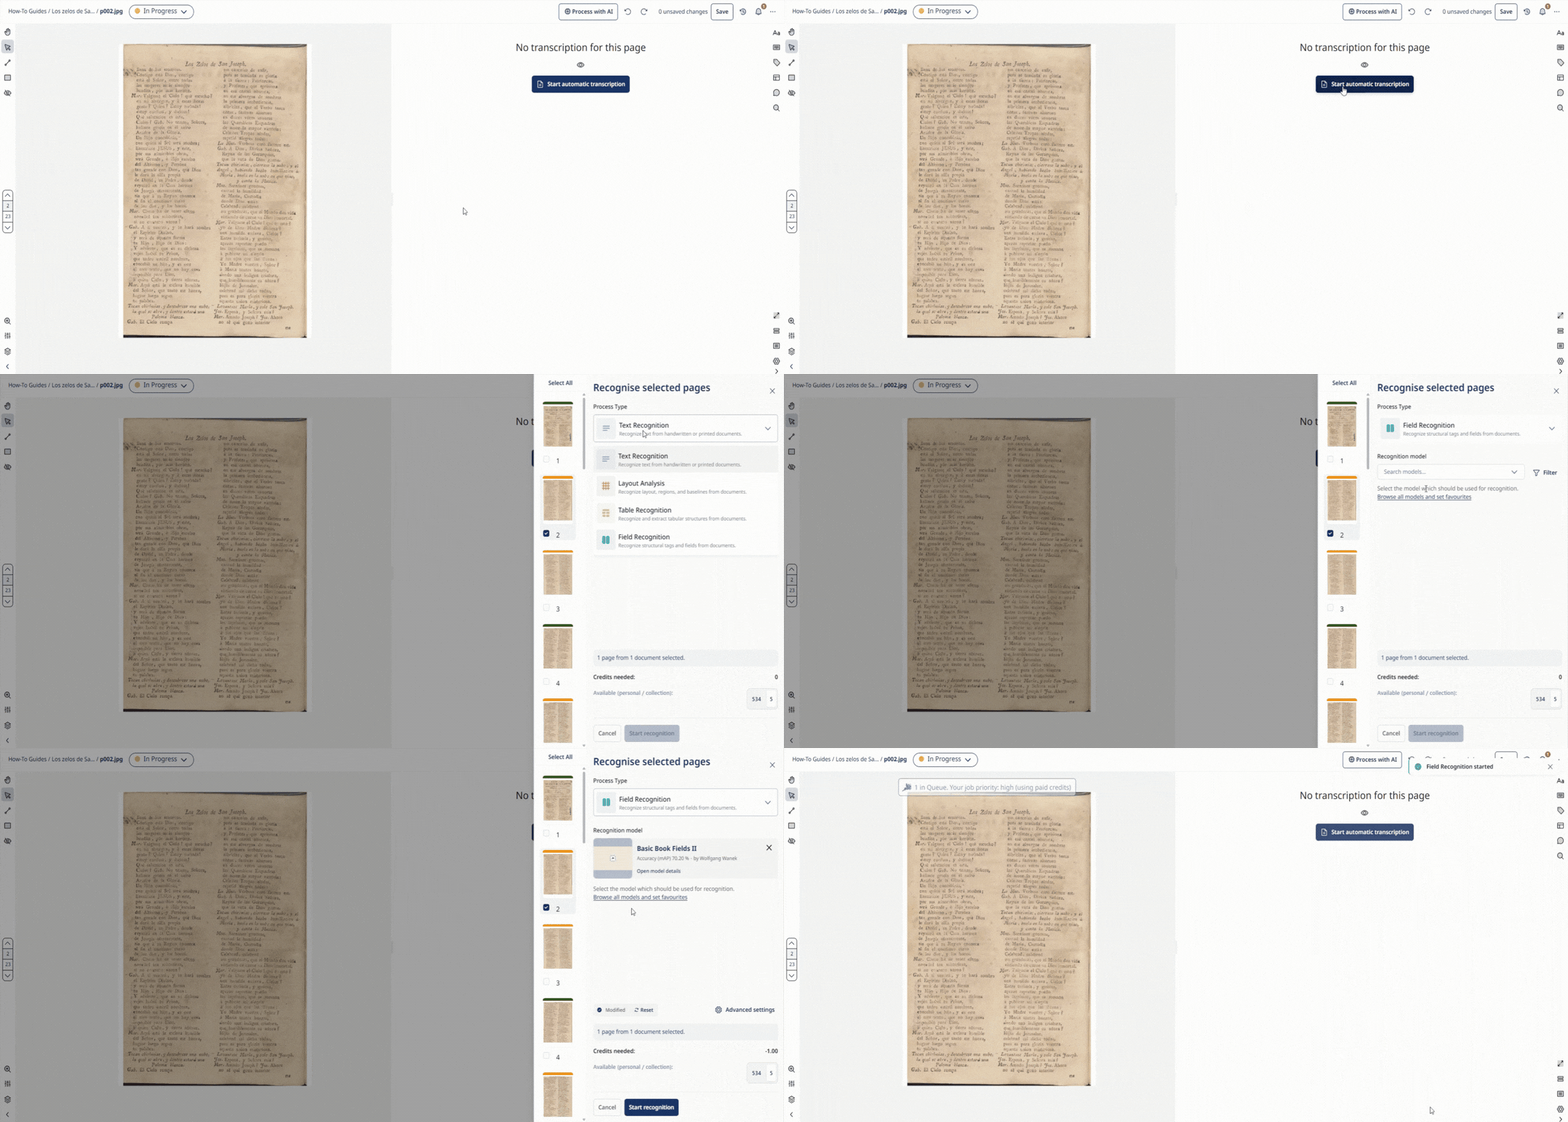
And that’s it! Your Field Model will now be applied to recognise the layouts of the selected documents or pages.
Evaluate your Field Model
Instead of the CER (Character Error Rate), the accuracy of a Field Model can be assessed by looking at the percentage of the Mean Average Precision.
The Mean Average Precision (mAP) is a complex measure that evaluates how accurately the system detects and labels regions, considering whether they were detected, and how well their size and shape match the validation data.
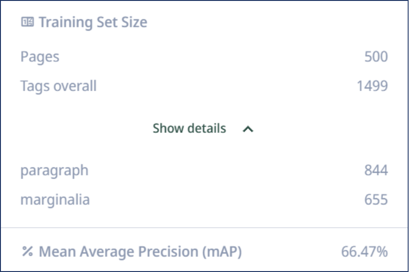
Models with mAP over 60% can already deliver very satisfactory results. However, we recommend always running a recognition test with your model and visually evaluating the results yourself.
When training your Field Model to automatically assign tags, check the number of instances per tag to see how often the model has encountered each tag during training. This helps you understand how well the model has learned to recognise and apply that tag in future cases.